
With SIM registration in full swing across the country, DITO SIM card users are busy registering their SIM cards to meet the new laws. If you are also a DITO subscriber and you need to know how you can register your SIM, then you are in luck, as there is a complete step-by-step guide for you.
Overview of DITO SIM card
In December 2022, the SIM Registration Act came into effect. The primary purpose of this law is to reduce, if not eliminate, all types of fraudulent and criminal activities that are committed via the use of SIM cards. P
This law gives a 180-day time frame for the initial registration of an existing SIM card, so you have time until April 26, 2023, which is now extended to July 25, 2023, to register your DITO SIM card to avoid permanent deactivation.
So you still have plenty of time to register your SIM card, but it is much better to do it now as the idea is still fresh in your mind. Most of us tend to procrastinate and put things off, only to find that the deadline is near or has already passed.
So, it is recommended to save time and register your DITO SIM now! Also, it is effortless to register your DITO SIM, and it will take around one hour if you have your ID cards ready.
Step-by-step guide for DITO SIM online registration
New subscribers of DITO SIM can easily register via the SMS link, which they will receive after SIM insertion; however, existing subscribers can register with the help of the DITO mobile application.
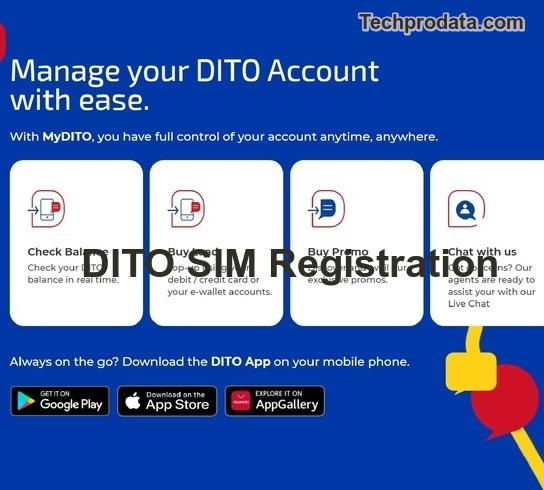
But if you do not have the DITO mobile application installed in the system, then you can easily download it from the App Store for both Android and iPhone.
Suppose you are an existing DITO subscriber. You can register your SIM by opening the DITO SIM registration link at https://register.dito.ph or by clicking on the banner on the DITO app.
It is recommended to use a mobile phone for registration as the registration form is designed for mobile usage only, so you may face difficulty while registering via any other device.
Now, here are the steps to be followed.
How to register dito sim
-
First open DITO mobile application
Here, you need to launch the DITO application on your phone, and once you are logged in you have to tap the ‘register your SIM card now’ button. Alternatively, if you do not have the DITO app, you can go straight to the DITO SIM registration site with the help of your phone’s browser.

-
Fill out the DITO SIM registration form.
Next, you have to fill out the DITO SIM registration form. You must provide your personal information, verify your mobile number, and upload your ID card. You need to provide the below information in their corresponding fields.
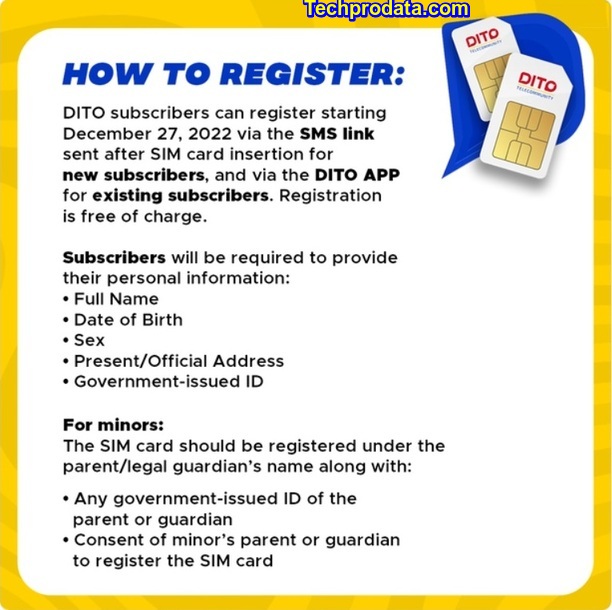
- Identity type – Select your identity type depending on any of the below criteria.
- Filipino – It is the default selection for Filipino citizens of legal age. No need to change this if you are registered on behalf of a judicial entity or a minor or if you are a foreign national.
- Filipino dependent – Choose this option if you register a DITO SIM on behalf of a minor or dependent as the legal guardian or their parents.
- Juridical entity – Select this option if you are a representative of a judicial entity like an NGO or corporation, and it is also authorized to register a SIM on its behalf.
- Foreigners having tourist visas – If you are a foreigner visiting the Philippines via a temporary visitor’s visa, you must select this option.
- Foreigners owning another visa – If you are a foreigner residing in the Philippines with another type of visa, i.e., student or work visa, select this option.
- Mobile number – You need to enter your 11-digit DITO number.
- First name – Here, mention your first name.
- Middle name – If you do not have a middle name, leave this field blank.
- Surname – Here, mention your family name.
- Date of birth – Mention your date of birth in the format MM/DD/YYYY.
- Gender – Indicate your gender in this field.
- Government ID – here, you must select an acceptable government ID like a Unified Multipurpose identification card, etc.
- ID number – next, you need to provide the ID number of the selected ID.
- House number – Enter your residence or house number in this field.
- Street – Mention the name of the street where you are presently living.
- Barangay/City/province – Provide your Barangay/City/province.
- Zip Code – Inset Zip code or the postal code.
- Identification card – Now, you must upload a photo of your government ID card, and the maximum size should be 5 MB.
- User photo – Now, you need to upload a photo of yourself with a maximum size of 5 MB.
- Mobil encumber verification – Next, you need to verify your mobile number with the help of OTP, which you will receive on your mobile number.
- Declaration – Next, you need to read the attestation or the declaration and then check the corresponding check box to ensure you have correctly read it.
- Data privacy statement – Select this checkbox to indicate that you agree to the data privacy statement of DITO. You also have to review all the information that you have provided and make sure that everything you are agreeing to is accurate and correct. Once the form is submitted, you will not be able to review or modify any of the details that you have submitted in the form. So it is essential to invest some time here. Spot your mistakes and then correct them before submitting.
- Submitting – Finally, you must hit the submit button to submit the DITO SIM registration and complete your registration process.
- SITO SIM registration is successful – Congratulations! You have now successfully registered your DITO SIM. You need to take a photo or a screenshot of this page as proof that you have done the registration. You can also save a copy of the SIM registration number for future reference.
Note – For successfully registering your DITO SIM, you will receive 2 GB of data, which you can freely enjoy for 7 days. You will also receive a text message from the DITO when this reward has been added to your account.